7 Tips & Tricks for Blower Door and Duct Leakage Testing

A typical BPI Building Analyst spends four to five days in a class learning how to do blower door testing, along with all the other stuff they need to know. HERS raters get all that but also have to learn how to do duct leakage testing. Then there’s that whole big bunch of people who have gone through one or two day intensive blower door and duct leakage training for energy code compliance. When they’re done with the training, how do they figure out how to do pressure testing in the real world?
The lucky ones work for companies where they get on-the-job mentoring. Many newly trained pressure testers, however, are out there doing it on their own. As a result, they can miss out on some of the techniques that experienced and proficient blower door and duct leakage testers use, so today I’m going to share some of the tips and tricks I’ve learned over the past dozen years.
1. Don’t do the blower door test first
Jason Payne taught me this one several years ago, and it makes perfect sense. I used to go in and do the blower door test first, then set up and run the two duct leakage tests. If you’ve done any of this testing, you know that it takes much longer to set up for the duct leakage testing. If it’s a hot, humid, or cold day, when you run the blower door first, you’re making the house uncomfortable for the whole time you’re setting up the duct leakage tests.
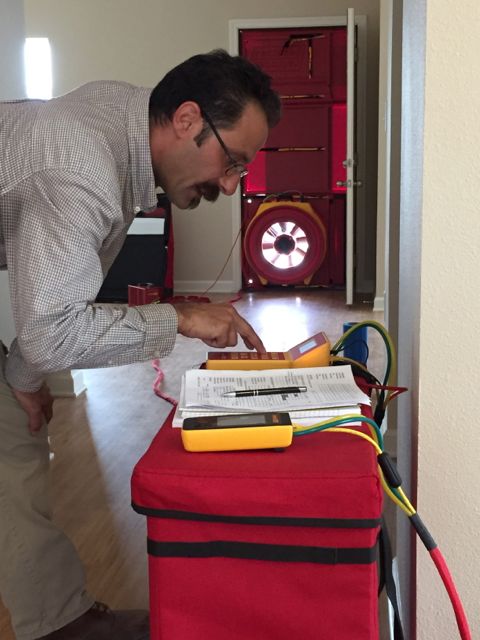
Instead, do all your setup upfront. Then run your two duct leakage tests. Once you’ve got those results, unseal the vents and run your blower door test. Running the tests takes only a few minutes if you’re just measuring performance. If you’re doing a lot of diagnostic work, too, it’ll take a bit longer, but as soon as you’re done, you can get the air conditioner or heating system going again.
2. Put the hose outside
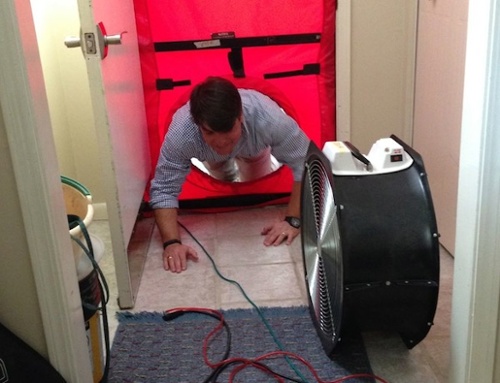
When you’re setting up the blower door, run your hose to the outdoors before you completely assemble the door. If you don’t, you’ll either have to take it apart again, go through another door, or do the “crawl of shame” (shown below) to get the hose in position. After you’ve suffered one or more of those inconveniences a few times, you’ll start remembering this every time.

3. Put the hose in a bag, can, or shoe
When you put the hose outdoors, you need to protect the end from wind. A good way to do that is to put the end of the hose in some kind of container that’s still connected to the outdoor air. You could use your shoe. You could use a plastic container. You could even use a bag. It just so happens that the little canvas bag for The Energy Conservatory’s DG-700 is perfect for this task.
In addition to protecting the end of the hose from wind, doing this also helps protect it from water. A drop of water in the end of your hose can mess up your results, too.
4. Put newspaper over fireplace ashes
If you make the mistake of not checking the fireplace for ashes, the carpet is guaranteed to be white. I don’t know why this works, but I know from experience that it does. So first, check the fireplace for ashes. One method I’ve found that keeps the ashes out of the house is to lay newspaper over the fireplace and then use a spray bottle filled with water to wet the newspaper. It works.
5. Make sure your helpers know where to seal the vents
As I mentioned above, the duct leakage test setup takes the longest, and a lot of that time is used sealing up all the vents in the house. If people are hanging around, you can get them involved by having them do the sealing for you.
Andy Bell once used volunteers for this task and ended up with a mystery. When he hooked up the duct tester, he couldn’t get any pressure at all in any of the supply vents. What he discovered was that one of his helpers had opened up the return grille and taped up the duct on the inside, preventing any of the duct tester air from getting into the rest of the duct system.
6. Use Vent Caps
If you haven’t used Vent Caps yet, you’ll be amazed at the difference they can make in your setup time. They’re so much easier to use than grill mask, and if you do a fair amount of testing, they’ll pay for themselves pretty quickly with the money you save on grill mask. Eric Griffin, a building science consultant with Positive Energy in Austin, Texas, told me once, Vent Caps “changed my life.”

You’ll still need to buy grill mask because there will always be places where you just can’t use Vent Caps.
Disclosure: Vent Cap Systems is one of our advertisers in the Energy Vanguard Blog. It’s a product we use in our work and one that we’ve recommended for years.
7. Remember the science
When you’re new to the whole pressure testing thing, it’s easy to get fixated on the instructions and forget the science behind them. When you’re doing a duct leakage test, for example, sometimes you crank up the duct tester and you just don’t get much response in the pressure on the other side of the duct system.
That requires some troubleshooting and it’s best to start with the science. Here are a few reasons (most of which have happened to me) you might not be getting pressure at the other end:
- Your helper sealed the inside of the return so no air gets through. (See number 5 above.)
- You forgot to seal one of the return vents. This happened to me in a house with a wall stack connected to grilles on both sides of the wall. I connected the duct tester to one side and forgot to seal the other.
- The filter is dirty and you forgot to remove it, or the coil is really dirty.
- The supply vent you stuck the hose into is attached to a duct that’s disconnected from the system. Try different vents to see if you get pressure there.
- Your manometer setup is wrong. Maybe you connected the hoses incorrectly, or forgot to attach them at all.
When things go wrong—and they will—it’s an opportunity for you to understand the physics of pressure better.
This list doesn’t include a lot of the basic stuff you’re supposed to be doing anyway. I’m sure there’s also a lot more tips and tricks out there that I don’t know yet. What are yours?
Related Articles
Are You Using Vent Caps for Duct Leakage Tests Yet?
Fermi Problems, Blower Doors, and the Compressibility of Air
Size Matters — How Big a House Can You Test with One Blower Door?
Why Don’t More HVAC Contractors Own Duct Leakage Testers?
NOTE: Comments are moderated. Your comment will not appear below until approved.
This Post Has 18 Comments
Comments are closed.

The links did not work for
The links did not work for the related stories.
Thanks
Sorry about that, Albert.
Sorry about that, Albert. They all seem to be working now. Thanks for letting me know!
Another great tip is to put
Another great tip is to put your car keys on the hot water heater when you shut it off. This will save you lots of return trips and irate customers when you forget to turn it back on.
“Where are those keys?” ,oh yea, forgot the hot water heater again.
Indeed, that’s a classic one,
Indeed, that’s a classic one, Colin. I can’t believe I forgot to put it in the article. One caveat, though, is that you have to make sure it’s the driver’s keys on the water heater. Otherwise someone may be making another trip to the house anyway.
If you come across an attic
If you come across an attic hatch that appears likely to spill insulation over you and into the house when opened, slightly pressurize the building with the BD before opening it.
slick!
slick!
When air-barrier testing a
When air-barrier testing a commercial building that has an outdoor closet that is within the proscribed building envelope but not “connected” to the building interior, a separate blower door must be utilized (USACE Air Barrier Testing Guidelines). Use a canvas tarp that has one additional opening than the number of fans you’ll need; insert a homemade disc into the vacant hole to prevent air leakage; when a different ring must be inserted onto the fan (and you’ve decided you don’t want to stay cooped up in that little room for an hour), you’ll be able to re-enter the room by removing the disc rather than the entire unit.
Question about vents caps–
Question about vents caps– if they seal to the sheetrock how do you get inside to outside leakage around vents or you just assume their all sealed and all leakage is from ducts??
@Mark, I know that some
@Mark, I know that some trainers teach that duct mask should only be applied to the grille face, leaving any gaps between the grilles and drywall (or floor) open. That’s incorrect. Grilles should always be taped or sealed to the substrate. Here’s why: During normal air handler or furnace operation, little if any supply air leaks backwards through gaps around the boot. Those gaps are mostly an infiltration path, not so much a duct leakage path.
Keep in mind that during normal ops, static pressure at the boot is very low. Mostly what you have is velocity pressure. That means that the only supply air that leaks backwards into the attic or crawl is what happens to be deflected off the back side of the grille.
It’s well understood that duct pressurization overstates leaks in and around the boot, and understates leaks near the blower. The duct test fan artificially creates a static pressure of 25 Pascals at the grille, which is MUCH higher than normal ops. So when you only mask the grille face, leaving the grille-drywall gap untaped, static pressure induced by the duct test fan forces air backwards through those gaps, thus creating a leakage path that does not exist under normal ops (or greatly exaggerates that path).
So taping the grille to the drywall or floor best reflects normal operation. In reality, those gaps are mostly an infiltration path. The blower door will pick them up.
“If you make the mistake
“If you make the mistake of not checking the fireplace for ashes, the carpet is guaranteed to be white. I don’t know why this works, but I know from experience that it does.” This ALWAYS happens because no metal flue damper seals the chimney flue. To get a good seal (and a good product to recommend to customers) use the inflatable Draftstopper flue damper at http://www.batticdoor.com (no affiliation, but I have purchased some of their products).
Don’t hit the chandelier when
Don’t hit the chandelier when you remove the door frame.
Don’t stand on the hose.
Don’t throw the outside hose into a puddle.
If you add a second blower
If you add a second blower door test with your duct system sealed, seal the duct tester fan as well, you get a handy while not perfect infiltration value attributable to the duct system. In your test order it would come right after duct lekage to the outside.
If you are also getting your
If you are also getting your house infiltration cfm for your Manual J load calculation leave the duct system taped and put the shower cap over the duct blaster so that you take the ducts out of the blower door infiltration number. Manual J’s infiltration number is not intended to include the leakage through the ducts. The duct leakage is accounted for separately by Manual J.
Anyone else ever looked at those vent caps under infrared???? I have, a few times, it was very pretty seeing all the air leakage. I”m curious if anyone else has gotten a better seal than what I have experienced.
I strongyly advise duct
I strongyly advise duct testing to be done under pressurization. I understand that it’s a bit more of a hassle to change ranges but apart from that, the only other good reason for it is that the tester has its face stuck in the flex which shouldn’t be a problem. We are undertaking to compare calibrations in both directions for the DuctBlaster and the Rt DucTester to see if there is any difference.
I meant to say:
I meant to say:
I strongly advise duct testing under DEpressurization. The extra time ensuring register seals are in place and the chances of a seal blowing off and wrecking your test do not make it worthwhile. I know of NO good reason to test ducts with positive pressure. Sucking air out of ducts is faster and more consistent. There are a few points to remember when applying negative pressure and that topic could justify an article. Results will be identical if you connect your equipment up according to manufacturer’s directions.
In my experience, if total
In my experience, if total duct leakage fails, do outside duct leakage. It is a good test to see where the leaks are. Especially if the air handler is in conditioned space. (means only supply ducts are in attic and leaking.)
I would be interested in tips
I would be interested in tips for zoned systems. In my testing, zoned systems have increased in a major way over the last couple of years. If I have a problem, it will be with a zoned system.
Have one of those folding
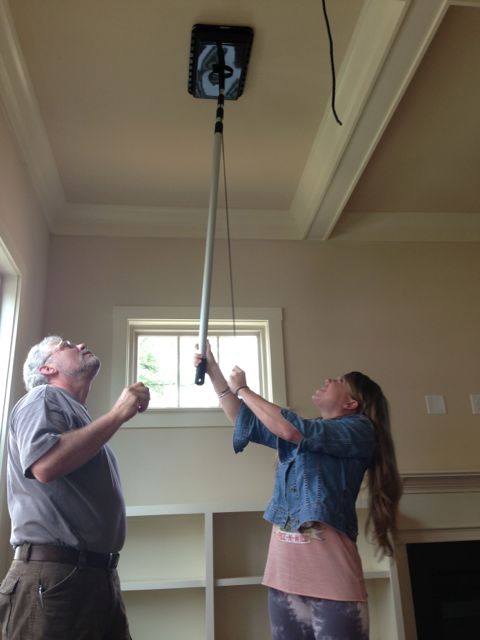
Have one of those folding ladders, not just an 8′ stepladder, for houses with high ceilings, if you’re short. (The vent caps don’t help you with return grills.) Or have a tall assistant.