How to Spot Improper Window Flashing
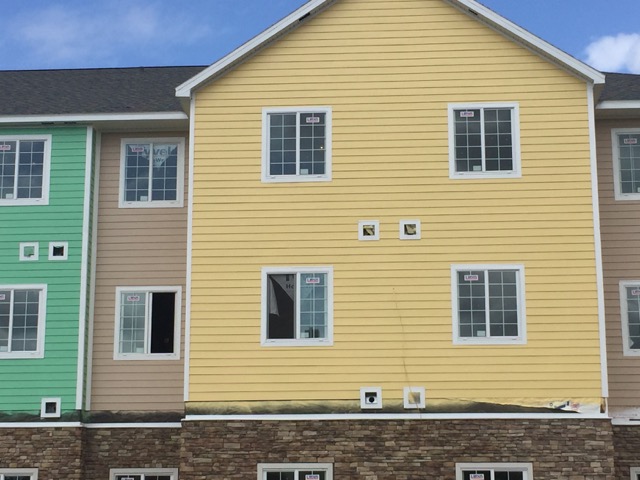
After taking classes for the past 15 years, my sister graduated from college last week. While I was in Lakeland, Florida for her graduation, I took the photo above. It’s a hotel under construction. I took this picture because I was surprised to see curtains in the windows at this stage of construction. Oh, wait! Those aren’t curtains. That’s house wrap.
The telltale sign of improper window flashing
House wrap acts as a drainage plane. It’s the control layer for liquid water that gets behind the cladding. Its job is to drain the water all the way to the ground without letting it into building. Shouldn’t be so hard, right? Gravity pulls stuff down, so just let it do its job.
One of the main problem points is at openings, like windows and doors. The house wrap has to be flashed properly to keep the water moving down and out, not down and in. That means you want the upper layers to come down over the top of the lower layers. Where builders often get this wrong is at the top of a window.
In the photo above, I spotted the house wrap hanging down from the top of the window inside the building. That means they didn’t shingle the house wrap over the top of those windows. The house wrap runs behind the top of the windows. Here’s another photo showing the same improper flashing.
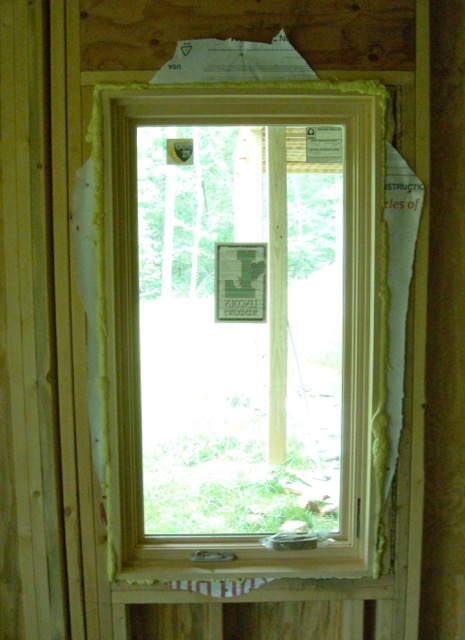
When you see house wrap wrapped around the window header on the inside of a building, it’s not done properly.
The official Tyvek window flashing instructions
In both of the photos above, the builders used DuPont’s Tyvek house wrap. (If I were going to use house wrap on a building, that’s what I’d use, too, because it handles water better than the perforated plastics, but that’s a different issue.) It shouldn’t be that hard to follow manufacturer’s instructions, but that doesn’t always happen.
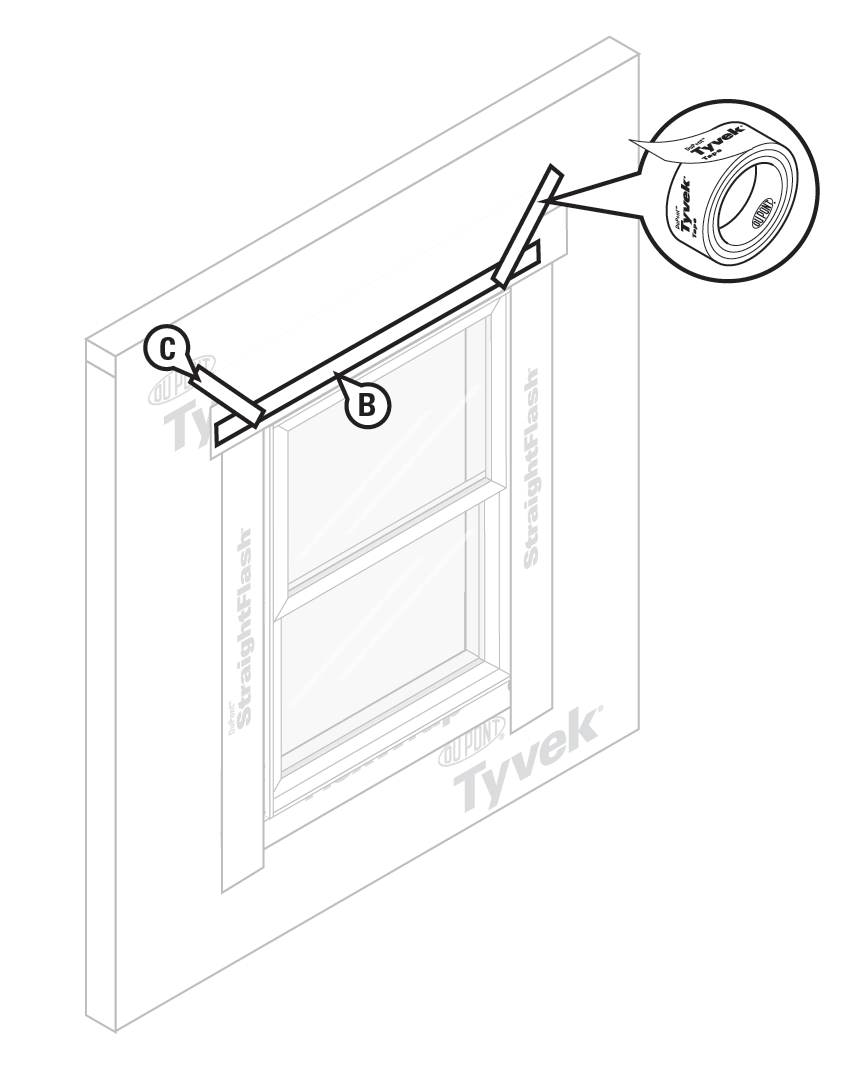
Especially with the ease of looking things up online now, finding the proper methods for stuff like this is easy. If you go online and search for “DuPont Flashing Systems Installation Guidelines” or something similar, you’ll find their ten page pdf on how to do this properly. Here’s the diagram for step 1 in the window flashing process.
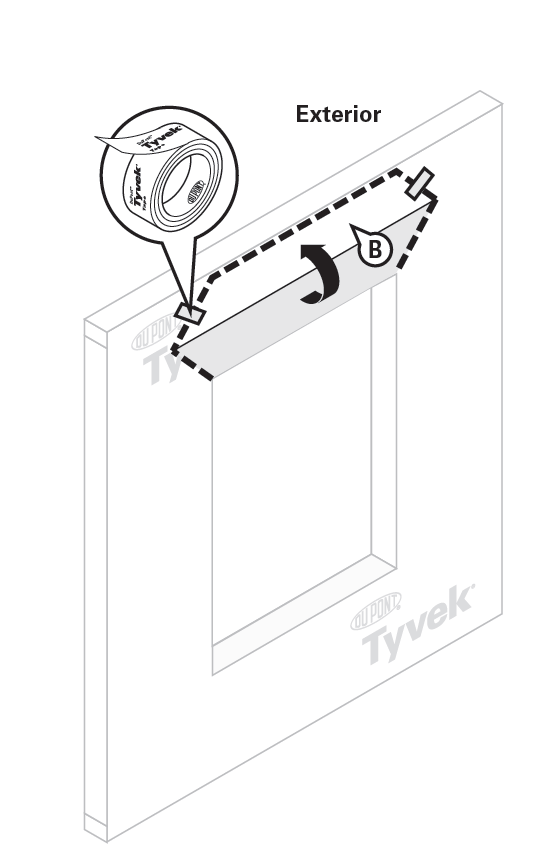
Notice the difference? The house wrap is pulled up on the exterior of the building at the top of the window. After some other steps, here’s what the step 4 diagram shows:
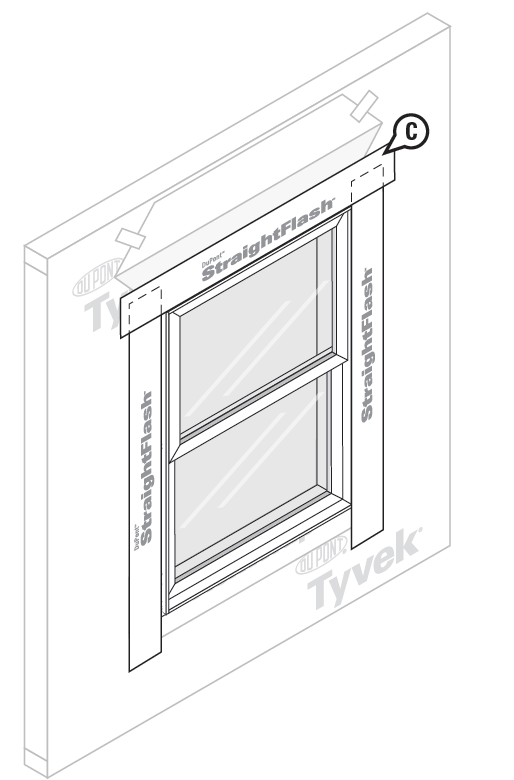
The window is installed. Next, flashing tape goes over the nailing fins at the jambs first and then the nailing fin at the header. Now we’re ready for step 5, below.
Now that flap of house wrap above the window comes down and gets taped off. Voilà! We’re done. Now the rain can drain down the plane, even when we’re not in Spain. (Now you may groan.)
Allison A. Bailes III, PhD is a speaker, writer, building science consultant, and the founder of Energy Vanguard in Decatur, Georgia. He has a doctorate in physics and writes the Energy Vanguard Blog. He is also writing a book on building science. You can follow him on Twitter at @EnergyVanguard.
Related Articles
The Drainage Plane Flashing Battle Continues
2 Bad Ways to Install Windows the Hard Way
The Pen Test — A Control Layers Tool for Architects and Contractors
Air Barriers, Vapor Barriers, and Drainage Planes Do Different Jobs
Image credits: Photos by Energy Vanguard, window flashing diagrams from DuPont™ Flashing Systems Installation Guidelines.
NOTE: Comments are closed.
This Post Has 7 Comments
Comments are closed.
Where is your improvement in
Where is your improvement in the detail? Moisture comes behind your siding where hot meets cold. The wings of the header flashing are wide open and will redirect water inside the window cutout-jam gap. Your window flashing either requires counter-flashing / termination above the window. Tyvek over your flashing makes proper termination of the flashing unlikely.
Matt, thanks for your comment
Matt, thanks for your comment. Are there better ways to flash a window? Probably. Will DuPont’s Tyvek method work better than what’s shown in the photos above? Absolutely.
Since you don’t like the method DuPont recommends, I’m interested to hear how you flash a window.
The water that comes down the
The water that comes down the face of the wrap denotes much bigger issues, some type of catastrophic failure. The moisture I’m talking about is the normal breathing of the house through porous gaps in the wrap. You do not want to cut Tyvek and then leave any holes open to freely breathe. Open cuts in the house wrap are invitations to rot.
I prefer metal flashing all the way through the cutout sealed by peel & stick to wrap. Metal flashing is installed from bottom to top, to create laps over the previous piece and sealed to the wrap. The peel & stick adheres readily and permanently to both the metal and the Tyvek. Firestone’s Waterblock sealant behind the metal to give a second line of defense. Every in-flow of air slowly deposits moist air behind your wrap. As the house exterior warms the air escapes, but the moisture is left behind. Whether you use trim metal or something more significant, you’re looking at a detail that won’t rot out the window portal. And you’re looking at a detail that’s sturdy for the installation of window dressings.
No-flange windows perhaps?
No-flange windows perhaps?
JC, that’s a possibility, but
JC, that’s a possibility, but it still leaves the problem of water that gets behind the house wrap draining into the window opening.
Allison the detail is wrong
Allison the detail is wrong from the window manufacturers stand point. Today most manufacturers suggest that the Tyvek or similar paper be cut to the exact window opening. Then the sill flashing is installed over the top of the lower sheet of house wrap, the window is then set in the opening with a bead of calk on the sides and top flange against the OSB. The side flanges are then flashed onto the OSB and the house wrap. Finally the top flashing is set under the house wrap as in your installation with the flap taped in place. This is the AAMA suggested install method, although I always require primer on the OSB to get the flashing material to attach better than staples or nails when it starts peeling.
LOOKS LIKE MATT M KNOWS WHAT
LOOKS LIKE MATT M KNOWS WHAT HE IS TALKING ABOUT.THE CRUDDY COMPANY THAT BUILT THE APARTMENTS I LIVE IN , PUT FLASHING IN WRONG.MANY SICK VETERANS AND DISABLED FORMER HARD WORKING PEOPLE ARE DYING HERE. THIS IS A MATTER OF LIFE AND DEATH.