Easy Window Flashing at the Corners
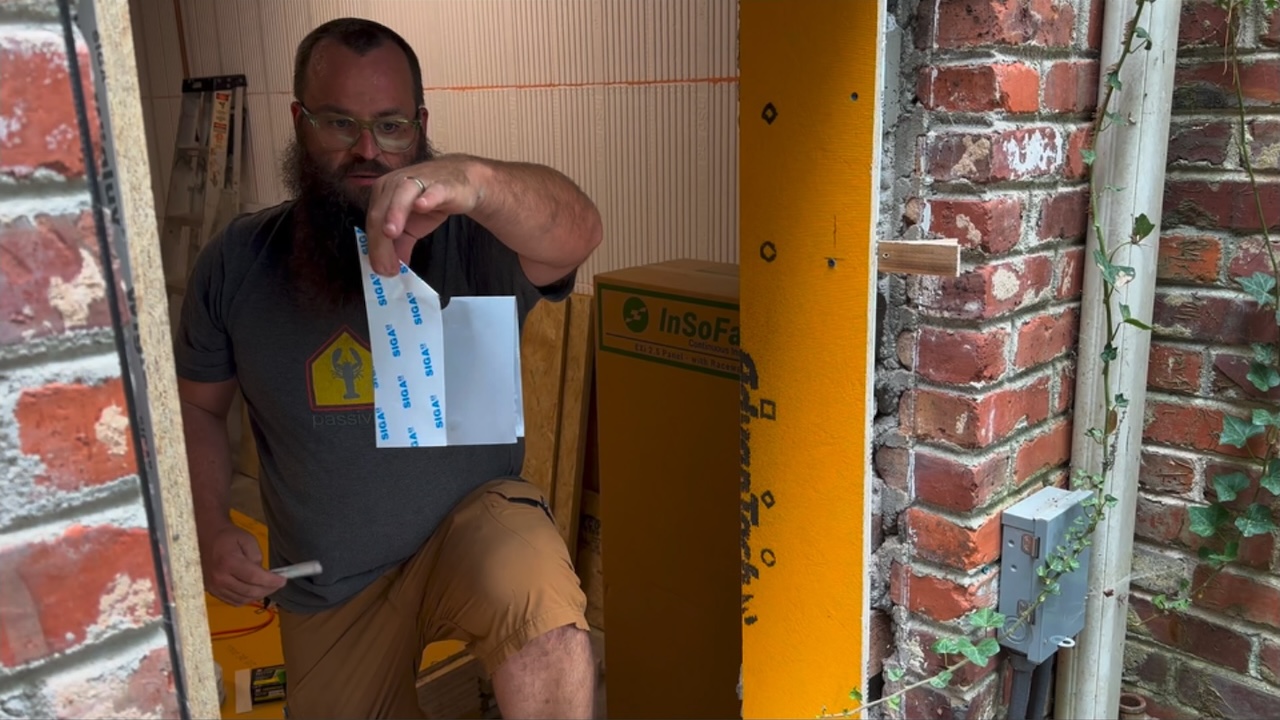
There’s a new type of flashing for window sills on the market now. It’s the Rissan 430 grey corner from Siga, which is a piece of pre-formed flashing tape that fits perfectly into the corners of door and window rough openings. I was lucky enough to get several Siga tapes and tools donated for my basement renovation and have been really impressed with them. I’ll cover the full window flashing and air-sealing process later. Today, though, I want to focus on this one piece.
The standard way to flash window sills
Window flashing has come a long way in the past couple of decades. It used to be just wrapping the rough opening for the window with the water resistant barrier (WRB). Then came the flashing tapes. Often they’re poorly applied and not integrated properly with the WRB.
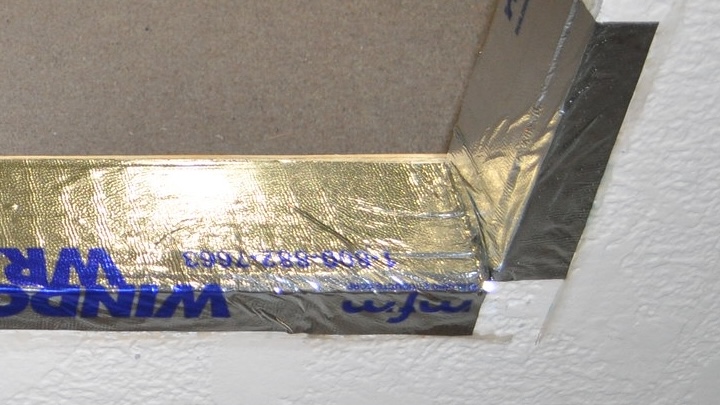
But the problem here is that empty square you see where the tape goes from horizontal to vertical. At the upper left of that square, water can get into the rough opening.
Some better ways
The obvious improvement to avoid the empty square is to do what’s called tape origami. That’s what Minnesota home builder Randy Williams did in the photo below. It takes extra time to do the fancy cuts and then apply so that it lies flat.
![Tape origami with Siga Wigluv flashing tape [Photo used with permission from Randy Williams]](https://www.energyvanguard.com/wp-content/uploads/2024/09/siga-wigluv-tape-origami-window-flashing-randy-williams.jpg)
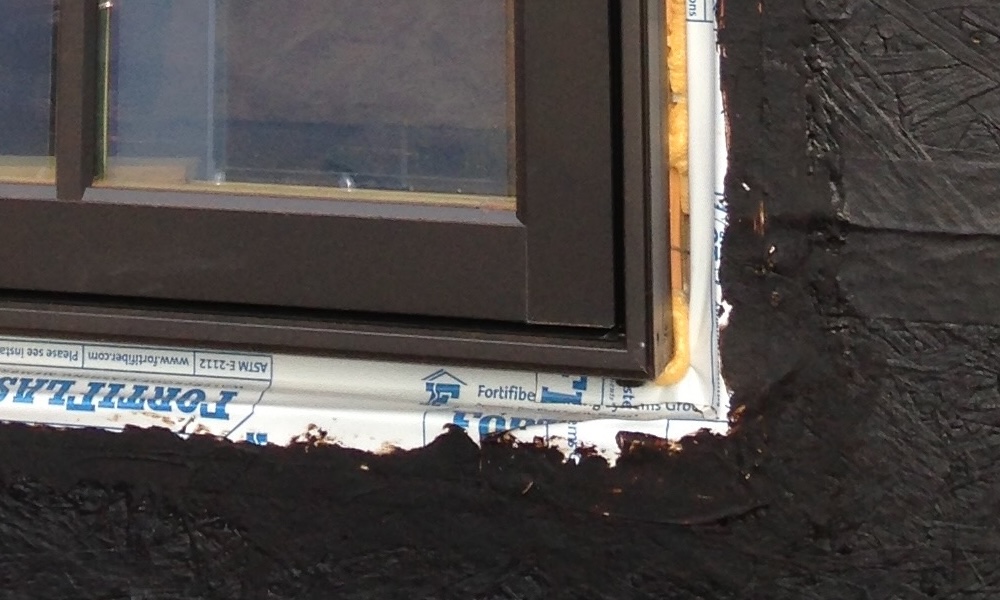
DuPont saw an opening in this market and came up with a way using a single piece of tape to span a corner with complete continuity. That’s their FlexWrap bending around the corner in the photo below.

Huber Engineered Woods has a similar product called Stretch Tape.
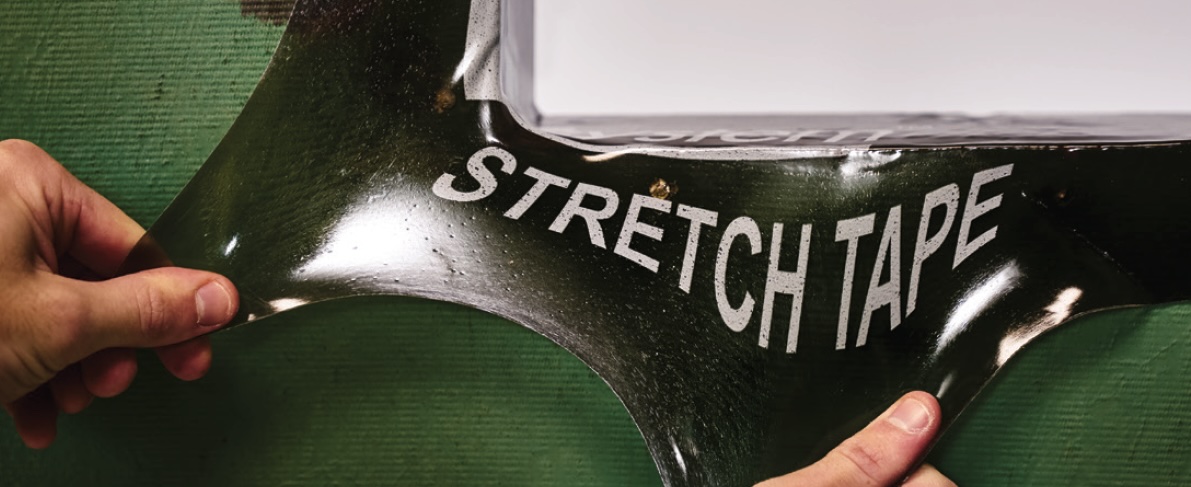
All of these methods and products have their pros and cons, but all can work well when used properly.
Meet the Rissan 430 grey corner
Now, let’s talk about the new kid on the block: the Rissan 430 grey corner. John Rockwell, a Siga rep, brought me a box full of Siga goodies the week before last. Unfortunately, we weren’t ready to install the windows when he was here. Then last week, Connecticut home builder Ben Bogie came down to Atlanta to help me get my four windows installed. After building and installing the window bucks, we applied the sill and corner flashing. Rather than write about the process here, I’ll let you watch Ben in action. The video below shows the start-to-finish installation of one of the Rissan 430s in a sill corner.
Maybe you didn’t time it in the video, but it took Ben only about a minute and a half to install one corner. And it’s easy to install it with no wrinkles or other defects that can cause leaks. Builder Randy Williams wrote about the Rissan 430 in his blog and said this: “I found the [Rissan 430] installs easier than other sill protection systems, there was no bunching of the tape in the corner and no ‘fish mouths’ to direct water behind the tape, which can be common with other systems.”
If I were a builder, the Rissan 430 as well as Siga’s other products would be a staple in my flashing toolbox most likely. Check out the Rissan 430 at the Siga website, and look at their other products while you’re there. If you’re looking for high performance materials for air and water control layers, Siga is one of the best places to go.
Disclosure: Siga donated the air and water sealing tapes and tools we used to install my windows.
Allison A. Bailes III, PhD is a speaker, writer, building science consultant, and the founder of Energy Vanguard in Decatur, Georgia. He has a doctorate in physics and is the author of a bestselling book on building science. He also writes the Energy Vanguard Blog. For more updates, you can subscribe to Energy Vanguard’s weekly newsletter and follow him on LinkedIn.
Related Articles
2 Bad Ways to Install Windows the Hard Way
Which Roof Penetrations Cause Water Damage?
Does Your Water Resistive Barrier Really Resist Water?
Comments are welcome and moderated. Your comment will appear below after approval.

I could swear when Ben holds up the corner flashing to show it before he applies it there is a black cutout in the inner corner. Is that a cut out and how does that seal if it is?
Wendy: Good eye! You’re correct that there’s something black there, but it’s not a cutout. After Ben took the backing off of the tape, he exposed the reinforcement added to that critical point in the Rissan 430. And that reinforcement is black. There’s no hole there.
Allison, this is getting well beyond BS (building science), and a warning: I’ll slice and dice (but I wish I could post image snapshots from the video with comments on them).
Fancy tape, not so fancy substrate! Or should I say, spongy and void-rich?
1. We are applying tape to cover moisture-vulnerable cut edges of what appears to be Advantech X-factor leftovers made to act as window bucks, at least on the sides. OK, good reuse, and assuming the tape will stay adhered on the yellow side, the “end-grain” of the OSB bucks isn’t the best, even for the fanciest of tapes. And then there is brick and the moisture migration it provides on a daily cycle, which could get behind the tape, and into the “end-grain” of the Advantech which then will swell. Yes, Advantech is still one kind of OSB board.
2. We are asking the tape to bridge an inch and a half void, and stay adhered to about 3/8″ of lumpy brick/mortar mix, at a 90-degree angle. Will the void space between the brick and the bucks be foamed? What will happen to the tape once the foam starts pushing, even ever so slightly?
3. The Wigluv Siga tape isn’t covering the PT lumber rough sill fully on the front edge. This way, we are encasing a piece of lumber (OK, PT lumber) in a sandwich between vapor retarders (and maybe barriers), yet leaving a sliver possibly exposed to bulk moisture.
4. Nothing appears to be protecting the wall below the window against bulk water entry yet. The comment below the video says, “Getting windows flashed properly is critical to keeping water out of walls.” Nothing has been flashed. A pan flashing covering the rough sill and extending far enough over the not-so-sloping spongy brick soldier course would be essential for success here. When the installed window is shown at the end, still no flashing. It’s getting a bit late for that.
5. I cannot wait for what’s next in terms of actually flashing the entire window to the brick wall, in a bottom-up fashion. Much of the tape used so far is not doing a lot, in my opinion, maybe even making things worse. I am afraid more tape is coming.
6. Is that a piece of old lumber “arrested” inside the masonry wall (at around minute 1:26 on the left side, and 2:03 on the right side in the video)?
Full masonry walls are not window friendly, especially in retrofits.
Paul: First, what you see in this video is a demonstration about the corner flashing. There’s still more to do on the rest of the flashing, and I’ll explain that later, but let me address the concerns you’ve raised here.
1. The endgrain of the Advantech is covered. Little moisture should reach it.
2. Yes, the space between the buck and bricks is now foamed. The adhesive on the Siga tape is super sticky, so I don’t think it’s going to fail.
3. The Wigluv tape is semi-permeable.
4. Again, this was about the corner flashing only. I’ll have full details about the rest later.
5. OK.
6. Yes. I don’t know why it was put there, but it’s still in great shape for having been embedded between brick and block for all these decades.
Au contraire on the masonry walls not being window friendly. They’re very forgiving because of their great moisture storage capacity. Yes, that can be a problem if it gets wet and stays wet, but there’s no evidence that that has happened.