Finding the Source of a Basement Water Problem
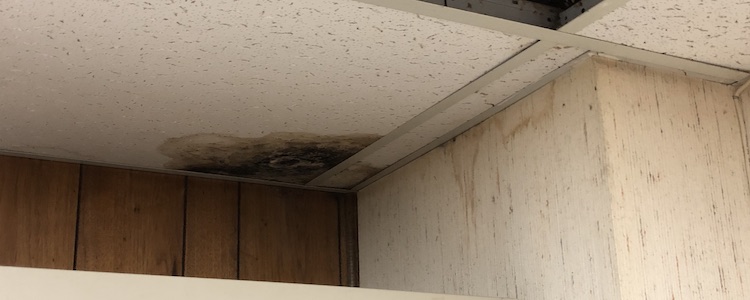
That photo above is from my basement. In case you missed my last article, I just bought a 1961 ranch-style house in Atlanta and am embarking on the wonderful building science adventure of turning it into a high-performance home. Ultimately, I’d like to take it all the way to net zero energy, too. My father-in-law, who sold us the house (Thanks, Stewart!), had some work done to improve it several years ago, so that water spot you see above is dry now. It just looks really nasty.
Until this week, though, I didn’t know what the source of moisture was that created the spot. Was it rainwater from outdoors leaking in through a penetration in the band joist? Was it a plumbing leak from the nearby kitchen? Was it groundwater climbing up the foundation wall by capillary action and finding an opening at this location?
Actually, it was none of those. Let’s peel back the layers and see what we can find. Here’s another photo, this time with the ceiling tile pulled away.
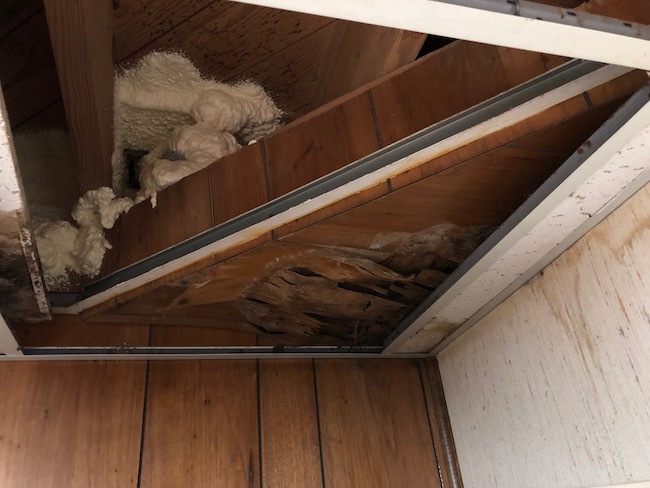
Here you can see that the current dropped ceiling isn’t the original one. At some earlier time, there was wood paneling in that corner where the moisture damage is. Above the paneling, you can see spray foam. But what else is going on up there? Let’s take a look.
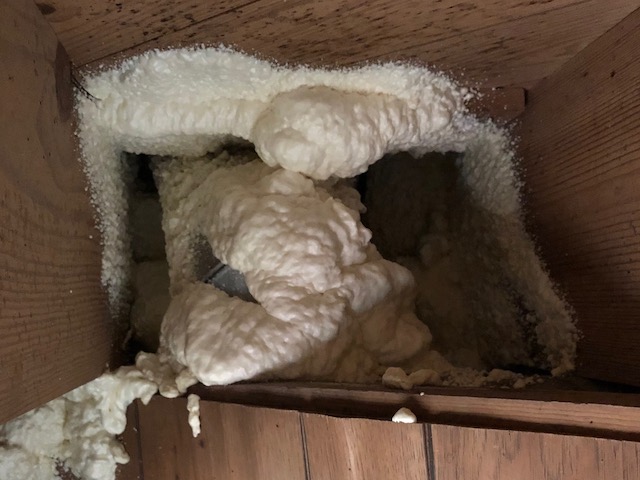
Well, there’s more foam, but if you look closely on the left side, you can see a bit of grey metal. That’s part of the duct that goes into the wall and delivers conditioned air to the den above.
Ah, now we’re getting somewhere! In summer, that duct gets very cold when the air conditioner runs. And cold surfaces can condense water vapor out of the air if the dew point is high enough.
Now, when you run an air conditioner and are able to achieve the ACCA recommended indoor design conditions of 75° F and 50% relative humidity, the dew point is 55° F. (That’s a handy fact for building science types to know, so you might want to remember it.) Also, the temperature of the air coming out of an air conditioner is usually between 55° F and 58° F.
So, cold air in the duct at close to or slightly above the design dew point should not present a huge condensation problem. That is, this duct shouldn’t have gotten enough condensation to cause the damage you see in the above photos unless either the duct was much colder than 55° F or the dew point in the room was significantly higher than 55° F.
I can guarantee you that duct, a good twenty feet from the air conditioner, wasn’t much colder than 55° F. No way. So that leaves the humidity being much higher than it should have been. But where was the water vapor coming from? Here’s another look above the dropped ceiling.
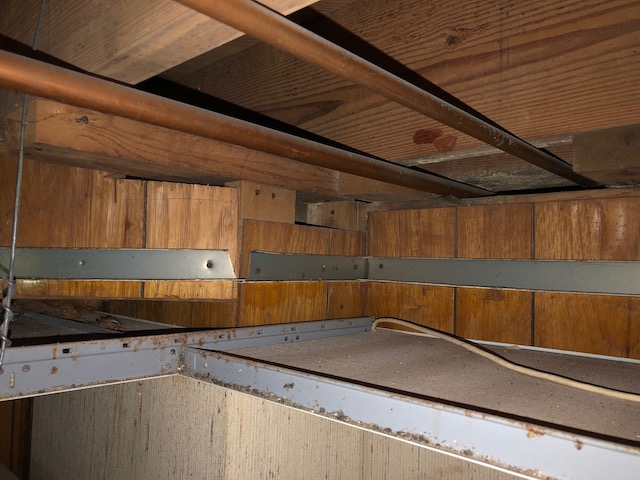
The moisture-damaged area is in the left center part of the photo above. Those two copper water pipes go to the kitchen. (That 3/4″ pipe on the left is the culprit in the slow hot water delivery I mentioned in my last article.) Notice that the two pipes go through a gap that’s an inch an a half high. Here’s another view of the gap.
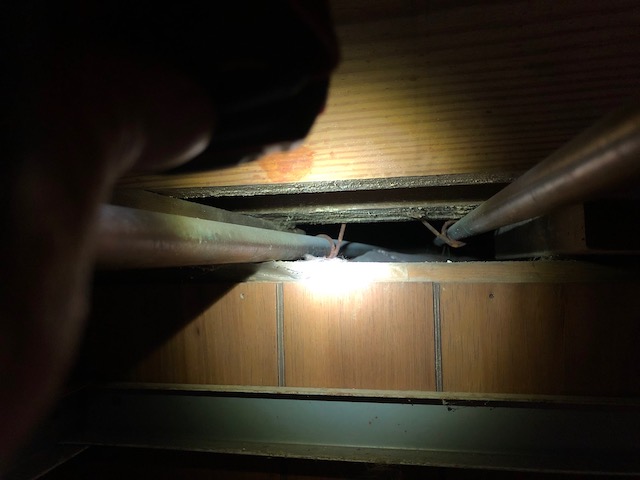
Through that gap and on the other side of that wall is a crawl space. The outside of that part of the house has foundation vents, indicating that the house was built with a vented crawl space. And anyone who knows a little building science can tell you that vented crawl spaces and the psychrometric chart are not friends. Translation: The vents in crawl spaces don’t solve moisture problems; they create them.
That was the source of the moisture. I say “was” because about four years ago, PV Heating & Air (the same company that put the new HVAC system in our office) encapsulated the crawl space. I don’t know the whole history of the work done on the house, but there’s also a small dehumidifier in the basement so the humidity down there is much better. The dew point in that part of the basement now is running at about 50° F, well below the design dew point.
In short, the problem in this basement was that someone back in the history of the house did not understand the first rule for preventing humidity damage:
Keep humid air away from cool surfaces.
Had they followed that rule, the ceiling tile would still be fine. The wood paneling above it wouldn’t be falling apart. And the duct above wouldn’t have become an accidental dehumidifier.
Related Articles
My New Project: A 1961 House With Home-Performance Angst
Two Rules for Preventing Humidity Damage
4 Ways Moisture Enters a Vented Crawl Space
Water Loves Cold and Other HVAC Duct Failure Stories
The Lesson of the Raining, Dripping, Crying Duct Boots
NOTE: Comments are moderated. Your comment will not appear below until approved.
This Post Has 5 Comments
Comments are closed.

So, encapsulating the
So, encapsulating the crawlspace solved the problem in the past. What caused the problem in the present? I must be missing something.
Dave, there’s no longer a
Dave, there’s no longer a moisture problem. The ceiling tile and wood paneling are dry now and that duct isn’t collecting condensation anymore. The dew point in the basement is running about 50° F now (71° F and 47% RH this morning).
Hi Allison,
Hi Allison,
When you own a home (or you and the bank) it changes everything, don’t you think? Utility bills are real; comfort is real; IAQ is real, especially if someone in your house has asthma. Here’s a way to describe my thinking before and after becoming a homeowner: Before I became a homeowner I was very idealistic and thought mostly about energy use. After I becoming a homeowner I’m still idealistic and care about energy use, but now I think about comfort and sustainability—what can Michele and I sustain, financially and morally, over the long haul.
When we first moved into our house there were ghosts on the ceilings of our bedroom. After some research we figured there were cold spots where the attic wasn’t sufficiently insulated. More insulation installed correctly solved the problem.
That brings me to another point that you may agree with, given the stain on you basement ceiling: Ugly and disgusting can be good motivators for change. Aesthetics matter, a lot for some of us.
Thanks for another great post. Sorry for going on and on.
Hey Allison,
Hey Allison,
I’m excited to learn more about your new place and how you seek to improve your “new to you” home! I know in your past article you mentioned several home upgrades, but I didn’t know if you had a preference for which upgrades would go before others / or an idea of your build order. I’m in a similar situation and need help defining my build order for greater improvement.
Allsion,
Allsion,
I have read your articles on conditioned crawl space and have the following issue going on.
1. Crawl space moisture issues in house built in 1959 that I am renovating
2. I have taken out subfloor and now have total access to crawl space
3. I have installed a French drain and sump pump
4. I will cover this with 12 ml vapor barrier
5. I will install radon mitigation vent under the vapor barrier and vent it through roof
6. I will install a humidifier and drain it to sump pump
7. The vapor barrier will be sloped to also drain in sump pump should plumbing issue arise and water leak from pipes in crawl space down to crawl space floor
8. How do I get fresh air down there? Is the humidifier enough to do this?
Thanks and thanks for the good articles.